When I got up yesterday morning, I was bound and determined to cross a particular irksome job off my to do list – deep cleaning the car.
But then I saw the rain and felt the cold and decided no, that would not be car-cleaning day after all. It was actually a day for an inside project – new pillows for the living.
This is a pattern-free project. Whenever I can avoid using tiny, sharp metal skewers to afix tissue paper shapes to fabric and then cut on the dotted line, I surely do it.
Step 1: Start on Pinterest (When is this not Step 1??)
I did a simple search for “throw pillow DIY” and picked out some styles.
This one caught my eye first:
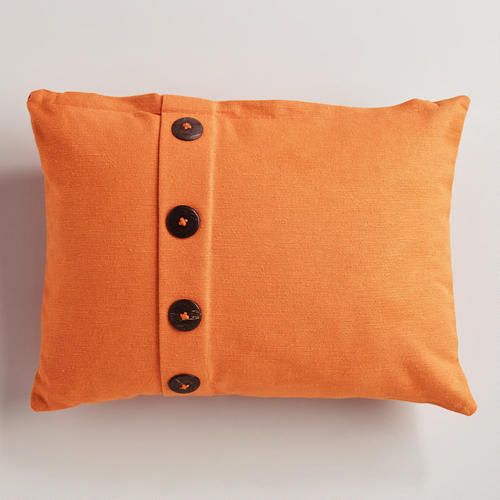
(I believe this one is from WorldMarket)
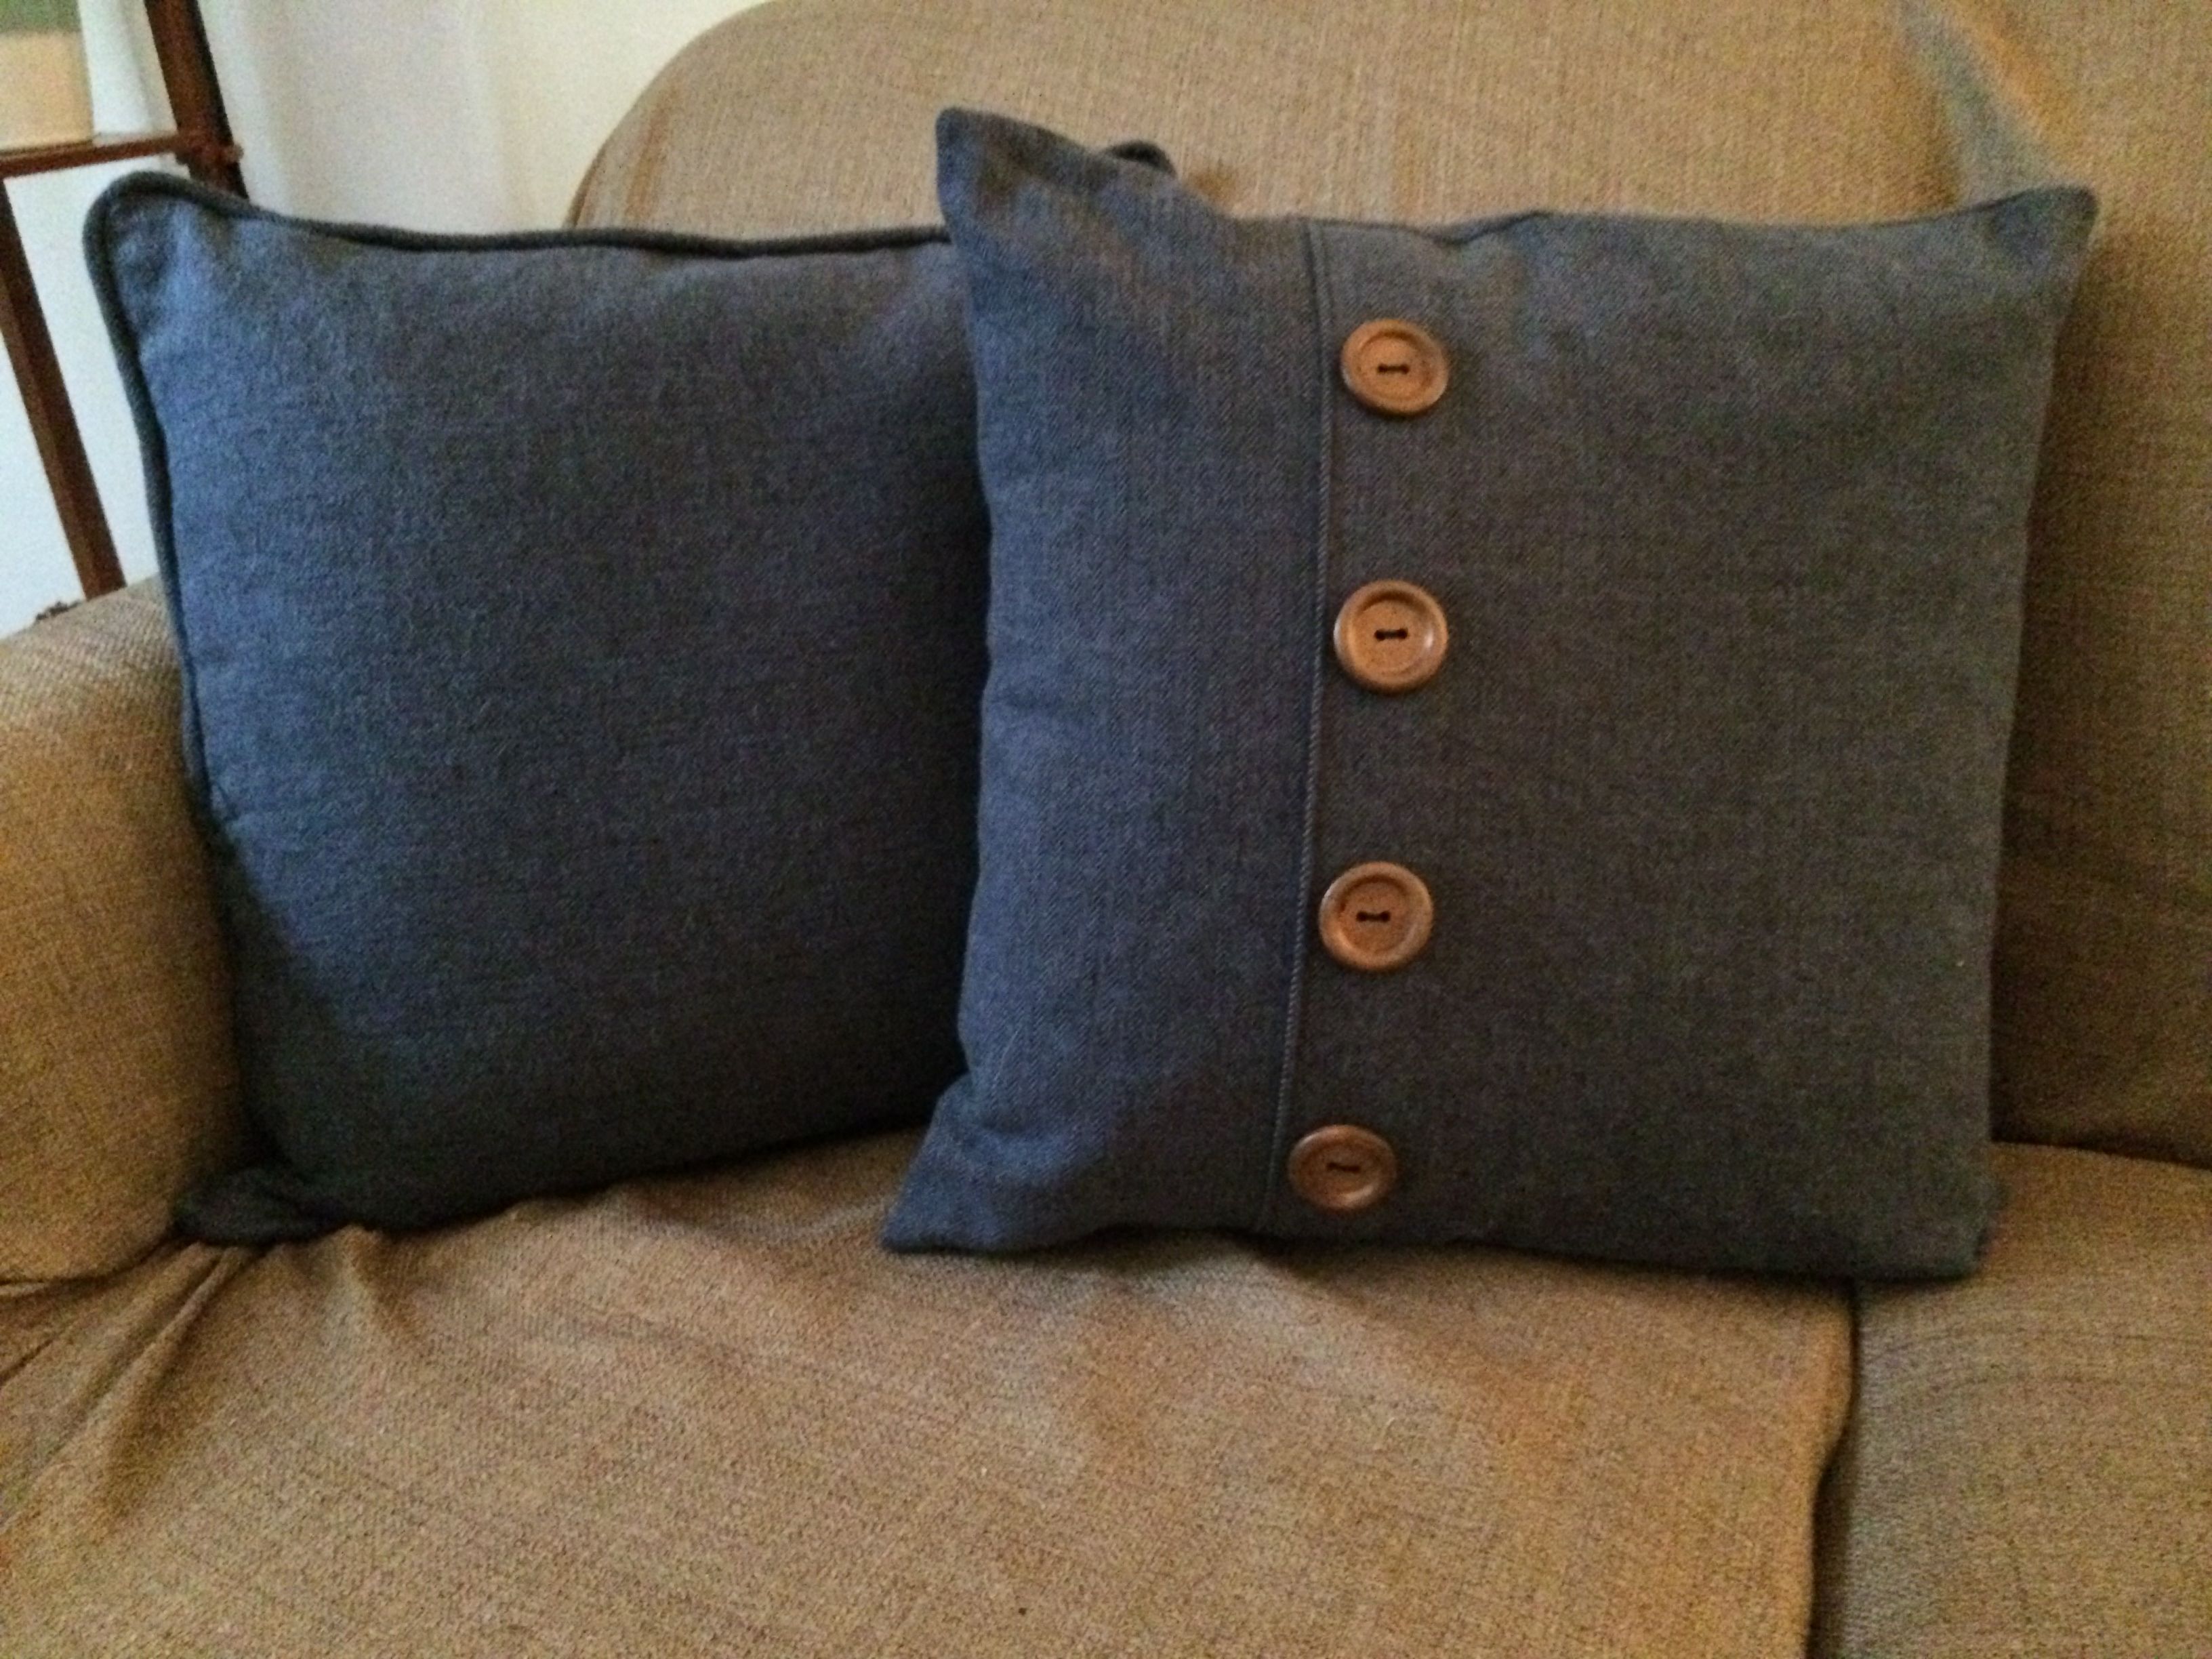
I love decorative buttons.
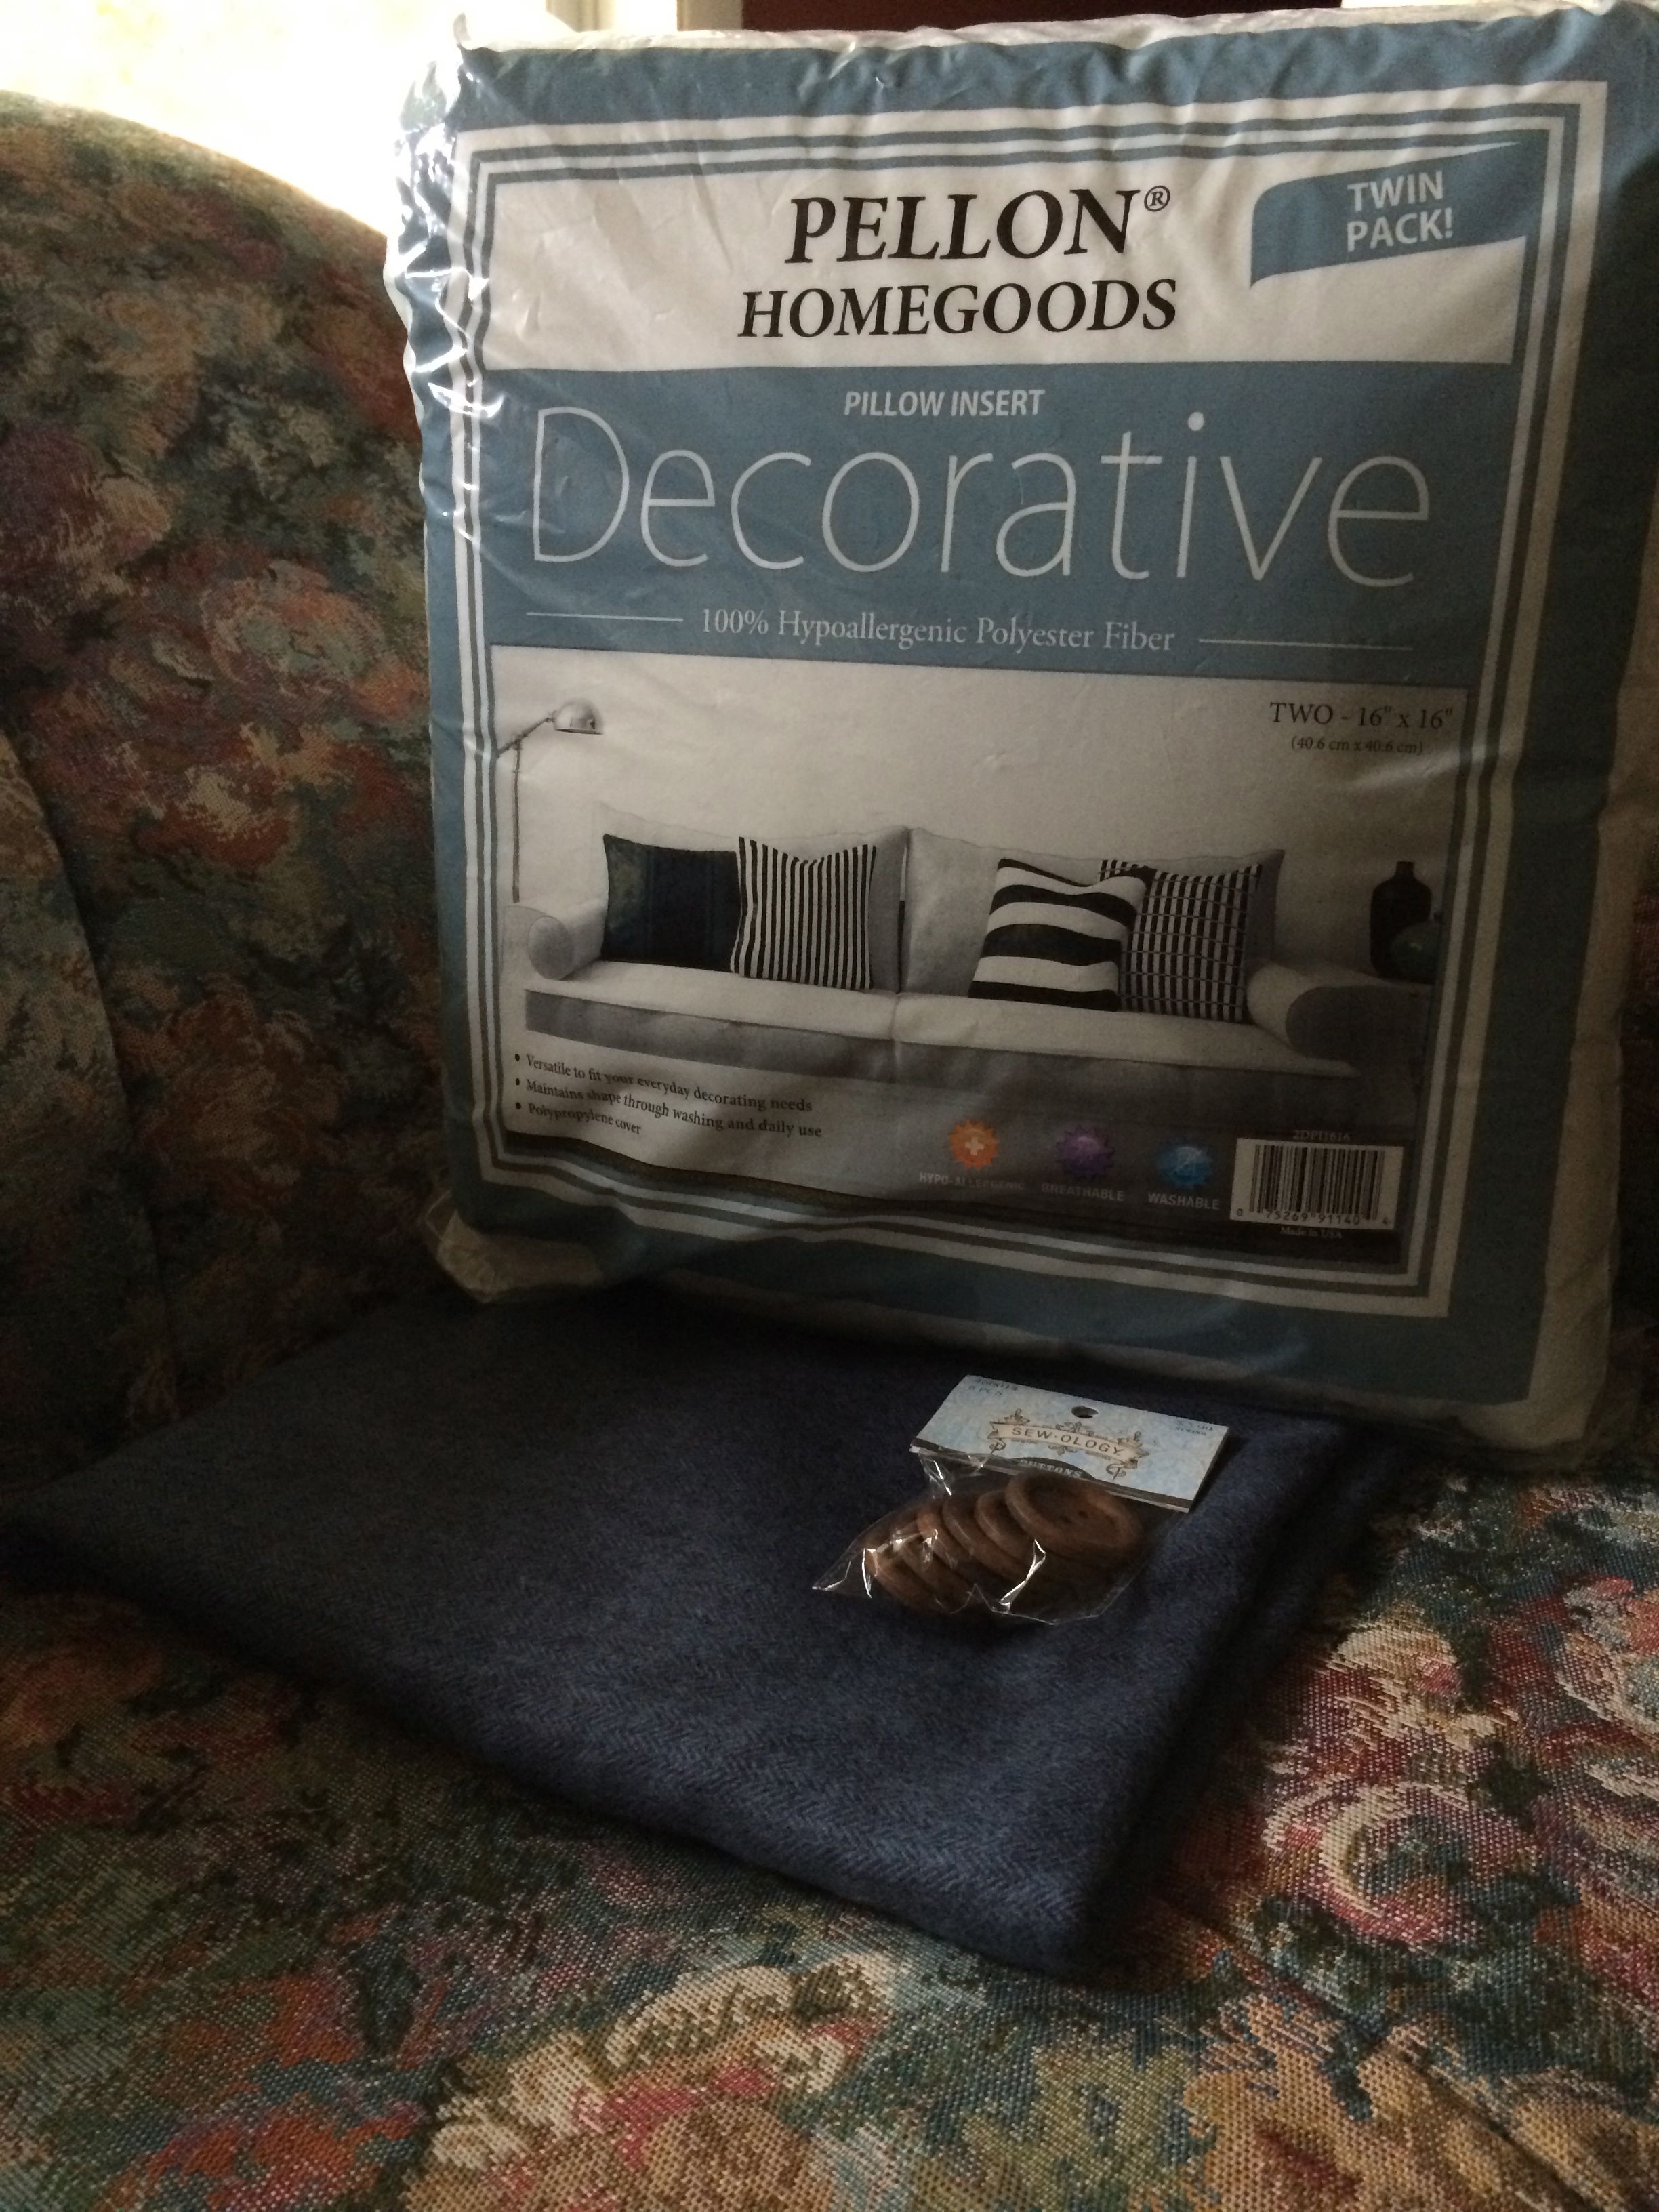
Step 2: Gather supplies. Pillow forms at 50% off and clearance fabric? That’s an “oh yeah!” – plus very economically priced buttons at Hobby Lobby and we’re ready to roll.
Step 3: Assemble pillows
My pillow forms were 16.5 inches across, square. I cut my fabric 1.5 inches larger to build in the seam allowance.
Pillow 1: The top piece was left three inches longer than the bottom piece. I fold it over in a 1.5 inch fold to mimic the fold over look, ironed it flat, and hand stitched on the buttons.

Minor details – After ironing, I did throw in some basting stitching across the edge to keep everything in place and then added a narrow line of stitching on the fold only because I thought it looked more polished.

To finish the pillow, I sewed the four sides, leaving an approximately 5 inch opening, added the pillow, and hand stitched the opening close.
Pillow 2: I wanted to keep this pillow more simple, since the first pillow featured the button details. But, I still wanted something special to set it off – a fabric cording gives just the right effect.
In addition to cutting the fabric covers, I cut 1.5 inch long strips of fabric from the excess. I located a simple cord amongst some assorted sewing supplies and wrapped the fabric around it and based the casing closed.

Okay I admit, at this point, it got a little more complex than I had originally intended. Essentially, I stitched the homemade coding to one of the fabric covers, all the way around.
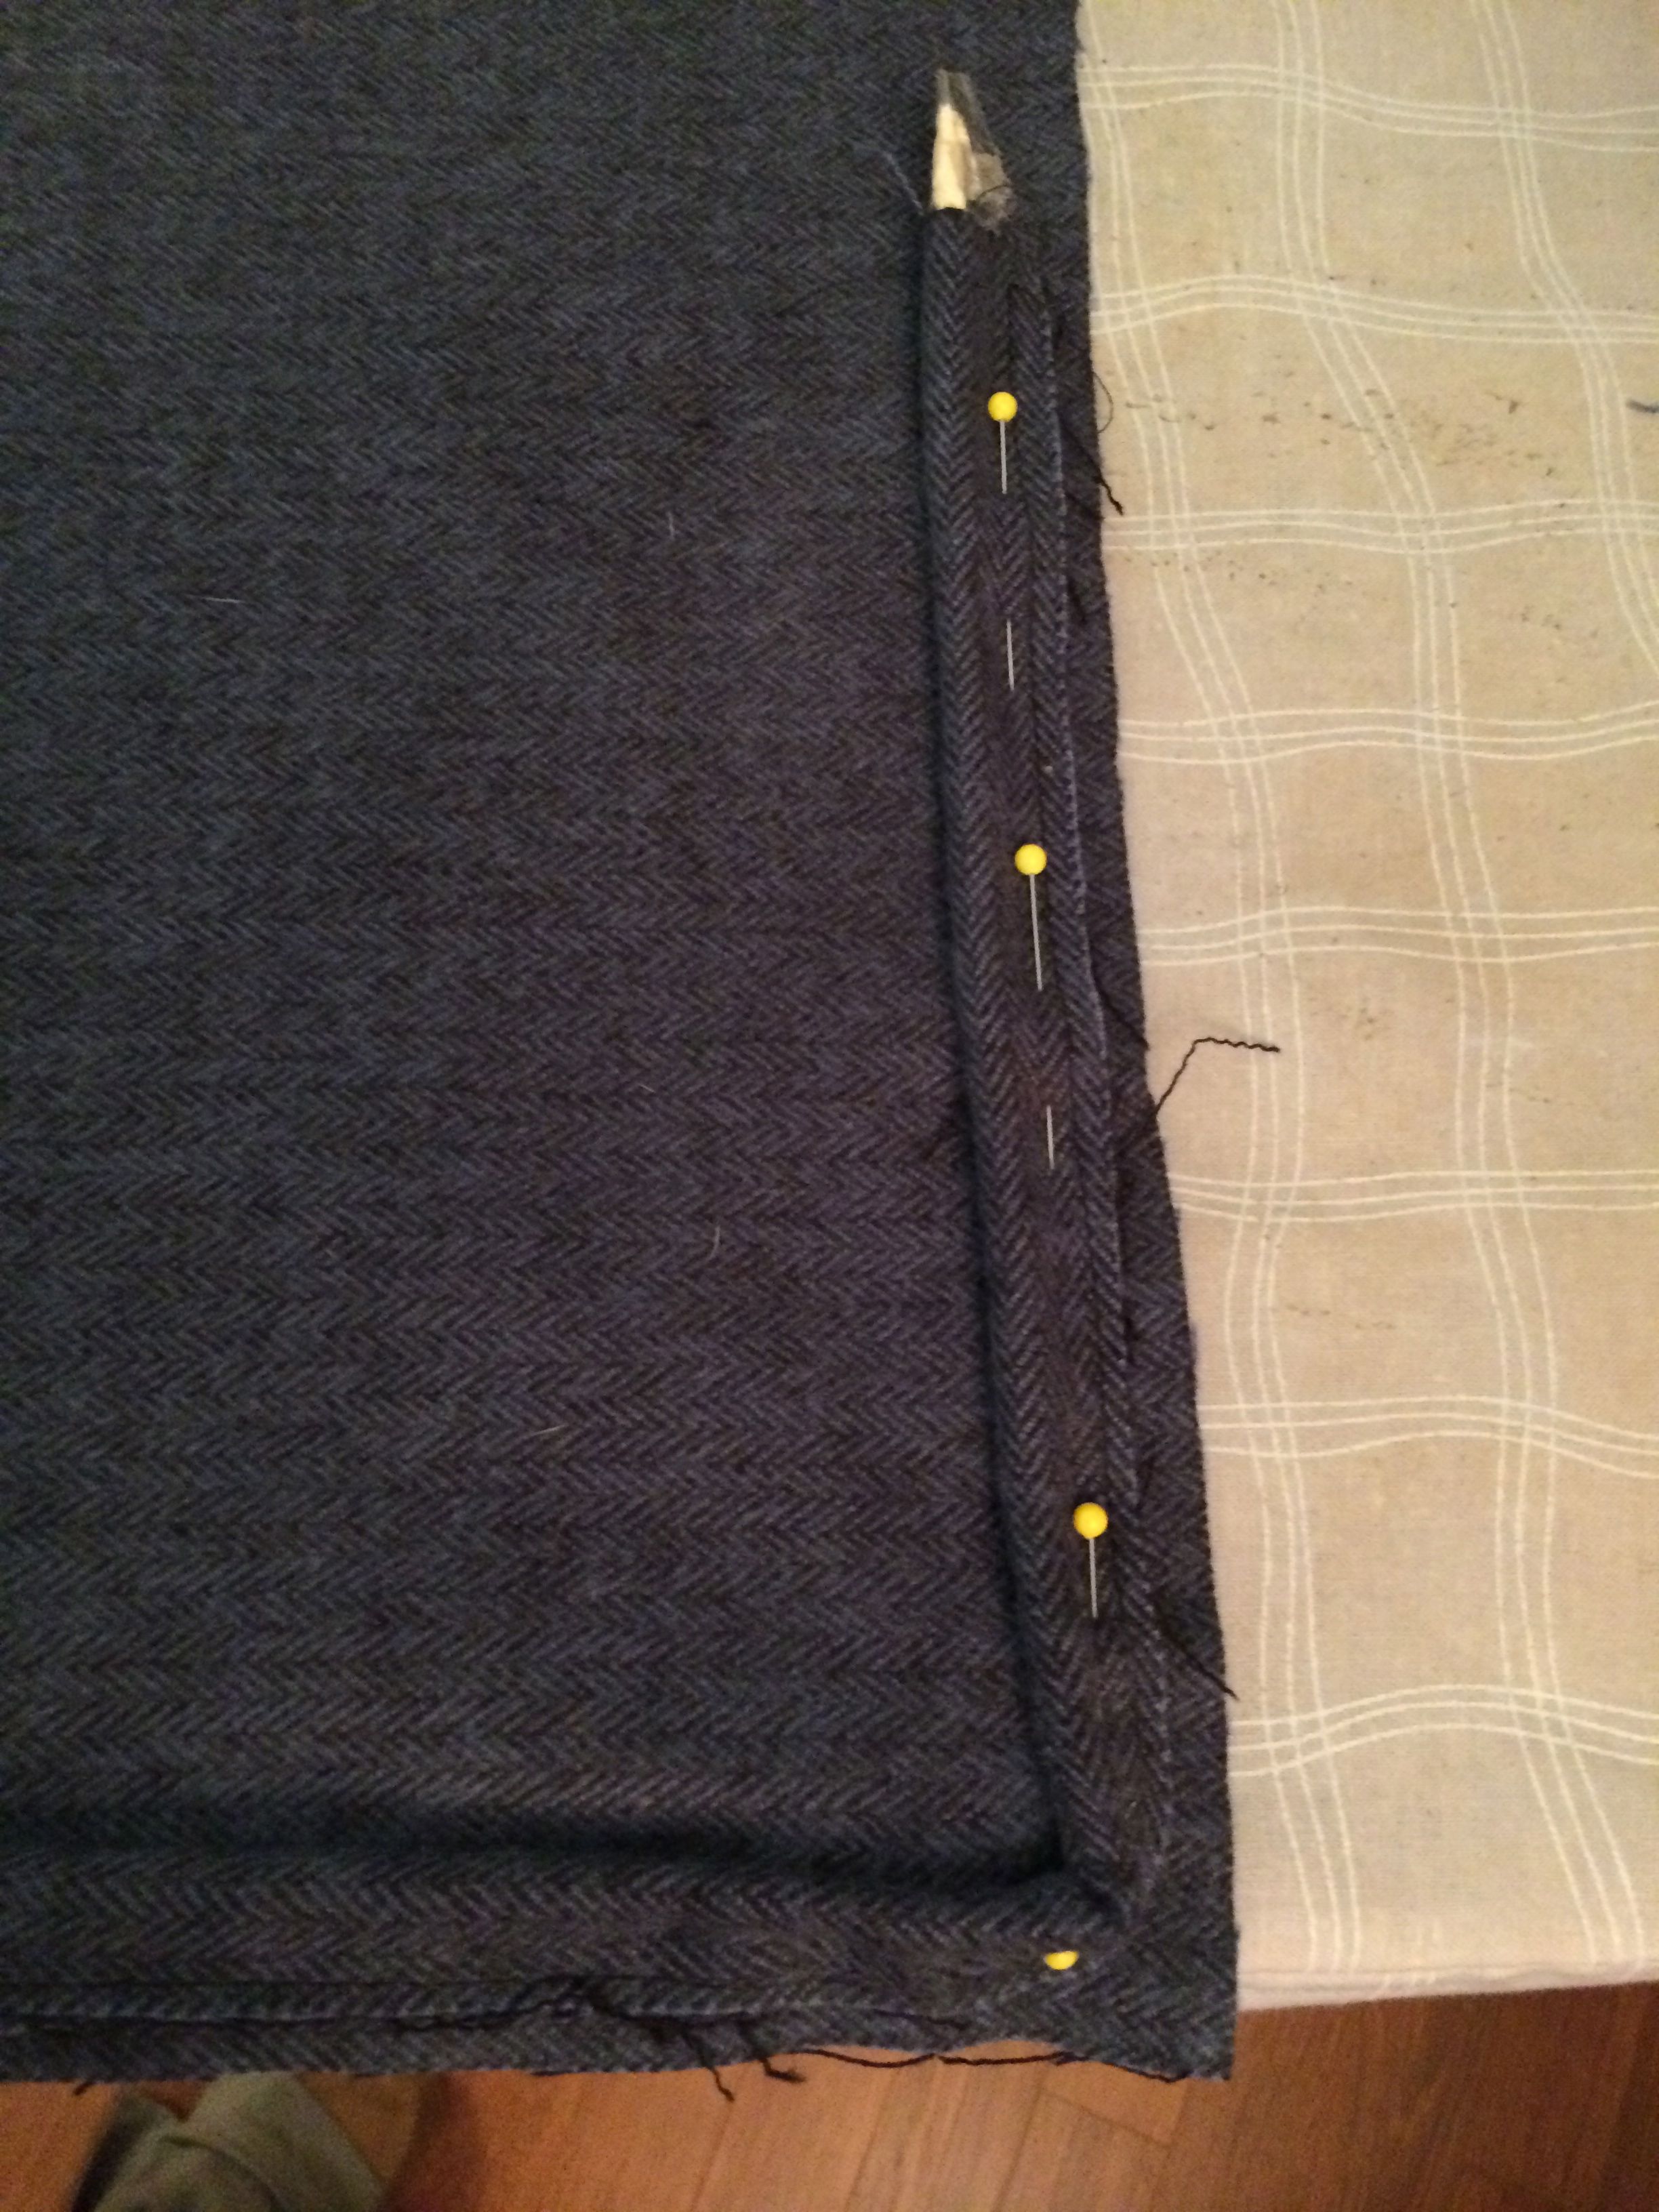
Once this was done, I carefully stitched the two covers together, being careful to stitch right along the cording. Lastly, I added the pillow form and hand stitched it close.
Done!